Thursday, November 28, 2013

Parsley pants test


Somewhere in the next two months I have to finish some formal outfits for the boys for a family wedding. I already made them some vests during Kids Clothes Week but I'm still pondering options for pants.

I have been buying a few patterns lately, one of which was the Parsley Pants pattern from Made by Rae.  I wanted to see if the style and fit was something I would use in a formal outfit, and also now that we are pretty much out of Big Butt Baby Pants stage its timely that I add another pants pattern to my collection.

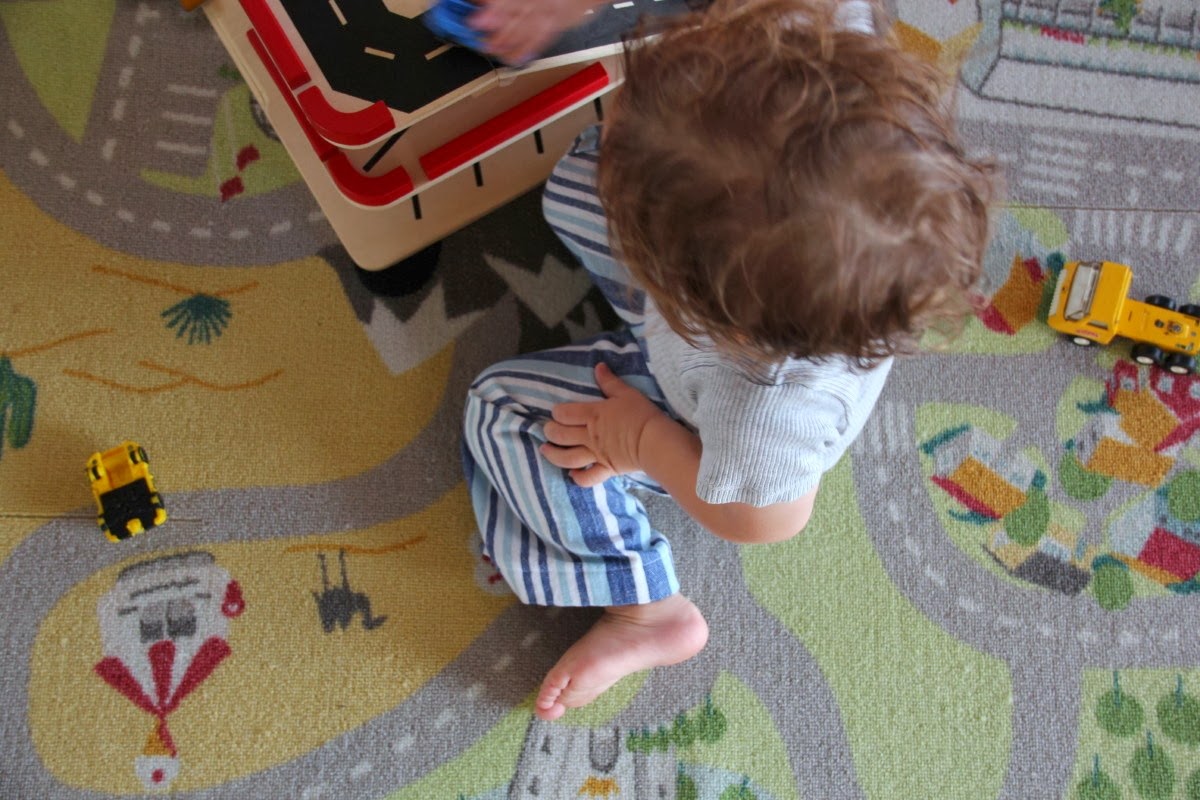
From my stash cupboard I pulled out a lovely woven Indian cotton fabric in blue and white stripes and set to work on a test pair that would at least be good for everyday wear if everything went to plan.  I made a size 2 for my two year old and included the option for the box pleat pockets on the legs for a bit of fun.

They were good for playing...


...and good for eating...


...and good for climbing...


...and good for running away in a search for more biscuits.


So overall a success for the one wearing them!

My thoughts?  The fit is slim at the top and flared through the leg and I think I had in mind something with more of a straight fit, but that's something that would be easy to adjust.  They were also very long, I took up a heap of fabric into the hems.  I think I'll do some comparing with some store bought pants to see where I could tweak the fit a bit, and probably I should try them on with shirt and vest to see them as part of a whole outfit.  Some thinking to do here.

Have you made the Parsley pants pattern, what did you think?

Wednesday, November 27, 2013

Wednesday shop update


Ah, the poor little Maika shop, so neglected! This week though I have been giving it a bit of love and care and have been tidying up some of the photos and info...and in the bargain I've found time to add three boys t-shirts into the offerings.  The elephant and yacht are size 2 and the fish is a size 3 - lovely and soft knit t-shirts with original design appliques using fabrics from my scrap bag.

And if I keep up the pace on my list of things to do there could be a new dress coming next week.

Thursday, November 21, 2013

1000 cranes Tsuru skirt


It's not often I see something on the internet and absolutely must make one for myself but...when I saw Rae's flying cranes skirt on the Made by Rae blog it immediately made it up to the top of my list of things to sew for myself.

The fabric I just fell in love with.  Swoon!  It's the gorgeous 1000 cranes design from the Tsuru range from Cloud9 Fabrics.  I jumped online to search a piece out and found it for sale locally from Funky Fabrix here in Brisbane.  Once that little delivery of one metre of fabric had arrived in my mailbox I picked up a few extra supplies from my local sewing store and set to work.

For my skirt I have gone for a fairly full style with a gathered elastic waist.  I used Anna Maria Horner's free pattern for the Flirting the Issue skirt (it's more instructions than a pattern per se).  I used the whole one metre of fabric from selvedge to selvedge and added a contrasting band of pale pink homespun cotton to the lower edge which added about 14cm to the length of my skirt so it sits around my knees (Rae's skirt is above the knee but I like a little more length personally).

:::::::::::::::::::::::::

Here's a few details of the skirt construction:

The lining is a cotton lawn in royal blue. I was going to line it in navy but the cotton lawn didn't come in navy and in the end I realised that was lucky as it would have dulled the white print on the skirt too much.  I think maybe a pale pink lining would have been ideal but I kind of like the unexpected flash of bright blue underneath.  The lining is only as long as the dark blue cranes fabric so as not to affect the pink contrast band with blue show through.


I love a comfy elastic waistband. The waistband of this skirt is really wide (the wider the better for elastic waists in my opinion), but I have to admit that it's construction is fiddly.  You sew four casing channels around the top edge of the skirt and feed elastic into each of them - this is time consuming and hard on the fingers, the more fabric you have in the volume of the skirt the more difficult this task is.  I sewed the four channels and then gave up after pushing elastic through three of them.  I decided that was enough waist elastic for my needs anyway.  If I make a skirt this way again I am going to just put a single wide piece of elastic through the top like I did with my recent op-shop resize.


I attached the contrast band as the last step after constructing the rest of the skirt.  I made the band of pale pink by taking two strips of fabric about 20cms long and selvedge to selvedge wide (112cm).  I sewed these two strips together at the short sides (the selvedge edges) to create one big loop of fabric.  I finished one long edge with a zig-zag stitch to stop fraying and then ironed this edge over 1cm towards the wrong side.  I carefully pinned this folded edge of the pink fabric to the inside of the skirt so that it sat 1cm above the hemline stitching of the blue cranes fabric (the zig-zagged edge was facing the inside of the skirt).  I sewed the seam attaching the band to the lower skirt edge from the inside (see right hand side of the picture below).  Careful pinning here was the key to getting a nice straight finish on the outside.


Then I hemmed the pink fabric to my desired skirt length ( hem on the left hand side of the picture above).  On the outside of the skirt you see two hem lines on the blue which I think is a nice detail (see below) and the pink band looks like it comes down from behind the blue cranes and is not just tacked onto the lower edge of the skirt.


Such a good looking skirt and lovely to wear, it will be a favourite wardrobe piece this summer for sure.


Friday, November 15, 2013

Second hand re-size

What do you do when you find a really nice cotton skirt in the op-shop but it's a size too big?  
Well of course you attack it with your unpicker and your sewing machine to get the perfect fit.


I found this beautiful and light "Colorado" brand skirt in my local oppy and fell in love with the green floral print and the black border.  Despite it being a size 14 and despite it falling off me I bought it anyway.  It sat around for a few weeks while I considered what to do with it to make it fit.  It had a back zipper closure and a lining of white cotton, I could sense possibilities but couldn't quite work out a way forward.  I kept pinching in the sides and knowing that it would look really hack to just sew up the side seams a bit tighter which would have nasty flow on effects for bunchy lining and fabric volume at the waist.  I told myself: "Come on Caroline, you do so much sewing, you can do something smarter than that!"  Then I had a eureka moment and I picked out the zipper and sewed up the lining and the back seams to the waist and then sewed the lining to the skirt front where they met at the upper edge of the skirt.  Now I had a skirt with no closures, but still too big.

Noticing that the facing of the waistband was wide enough to accommodate a nice wide piece of elastic if I made it into a casing, I sewed a seam around the waist of the skirt where the facing met the inner lining, picked open a gap at the back seam and threaded in my elastic.  Adjust to fit, sew elastic ends together, poke back inside casing and slip stitch the opening closed and you have yourself a new skirt with a fit just perfect for you.


A great sense of satisfaction, I love a good save of something old into something new.

Friday, November 8, 2013

400th post :: the one about the technology


Hello!  It seems I have had something to say over here 400 times over the last five years.  That's pretty amazing.  Sometimes blogging has been easy and sometimes its been really hard, I've waxed and waned with my enthusiasm for this space, but I've kept it up and that I'm proud of.  I'm proud of all the things I've made, amazed at all the skills I've taught myself and glad of all the people I've met.

In five years I've gotta say that blogging has changed a lot.  It used to be just me with my laptop in the night or at baby sleep time and I would sew and photograph, write posts, visit other nice blogs and write nice comments and that was really it.  These days though I'm more likely to be flicking through my favourite blogs on a reader, (still in the dark while I wait for my toddler to fall asleep or late at night on the couch), and I know this is the case with so many of you also.  Plus with the advent of social media there's so many platforms now on which to express your thoughts and share your projects that it's become quite the time consuming activity to keep yourself  "seen" and also to keep up with everybody elses goings on!    To be really honest on one hand I can't keep up with it, being everywhere on the web all at one time - I have a life! On the other hand I've become quite frustrated with plain old blogging and the time it takes to produce a blog post.  I've been struggling for about a year with some not quite 100% working DSLR equipment and that's been annoying, and these days my little laptop is not a quick and snappy as it used to be, and then my phone...well lets say its an old one and still a relatively good one but I kind of knew that it didn't really have the capability I wanted.  Me, need an upgrade? Need a re-think about the way I do things? Never!

But. My husband came home with a new smartphone from his work this year and I started to look over his shoulder at that shiny thing.  I slowly came to realise that next to my husband's new phone, my phone was really old.  It wouldn't load the latest versions of certain apps, the camera was rubbish, the screen was small and it had started to give me annoying little warnings about full memory.  Oh my little old android phone!  I didn't want to upgrade it just because I was caving in to a want for the latest, and definitely not if it was working just fine...as a phone.  Yes, I faced it, I took the plunge and got an upgrade, not the latest mind you, but good enough for me.

I wanted to make it easier to write blog posts, read other blogs and take great pictures away from my laptop.  Now I can do all that with my new phone, I can slip it into my pocket or bag, no big fat camera equipment, no slow computer, no finding the elusive camera cable so it will talk to said laptop.  It's quite the revelation and I know probably most of you have been doing it for years.  So I'm just declaring myself "in" with the 21st century crowd.  Someone once said, "If you can't beat them, join them".

The upshot of all this is that I've gone and signed up at Instagram.  You can find me there as maikacreations.  My pictures there are a bit more of a personal nature, some shots of my kids and the things we like to get up to as a family, but also a good dose of craft and works in progress.  It's great, I like the chatty nature of it, a bit like the old blogging used to be.  I've even found old friends who've given up on the blogging thing but they're alive and well on Instagram, and that's been nice too.

But the last laugh is on be because it took me over half an hour to put the little Instagram icon on the sidebar of my blog - sometimes I think it's my brain that needs the upgrade.

Thanks for reading and happy weekending to you all xx

Monday, November 4, 2013

One of those moments


We weekended away on an island and after a day of swimming and playing we had a bracing boat ride home with the wind in our hair.  Fresh sheets on the bed at bed time and he crawls into the crispy cotton with a sigh. "I love my Maisy pillow", he says with contentment. His childhood love of Maisy mouse and his Mama's love of sewing for him is wrapped up right there, warming my heart. Despite my own tiredness I read out loud a quick few chapters of his well read and loved Faraway Tree book and he's away to dreamtime.

LinkWithin

Blog Widget by LinkWithin