Tuesday, December 24, 2013

Holiday fun :: the end of 2013

Summer holidays are on and we are all at home.  We've been alternating between relaxing together and preparing for the Christmas celebrations.  Interstate and overseas guests are joining us this year so it's going to be a full house of laughter, stories, conversations, music and eating up a storm.  I think this will be my last blog post for 2013, time is sparce for blogging.  I'll leave you with some holiday pictures from the last few weeks:

:: we've been playing and tidying up in the garden ::


:: I've been keeping the kids amused sewing them some new pillowcases.  We went fabric shopping together and found the Christmas fabric to be basically sold out so we went for Dr Seuss and dancing gnomes.  I call this photo "Thing One and Thing Two" ::


:: I also snuck in making a new green pillowcase for myself using some vintage sheet fabric scraps ::


:: and in between all this, and usually at nap and TV time, I've been sewing myself a new dress.  Another Washi dress from this beautiful navy linen, a recent op shop fabric find ::


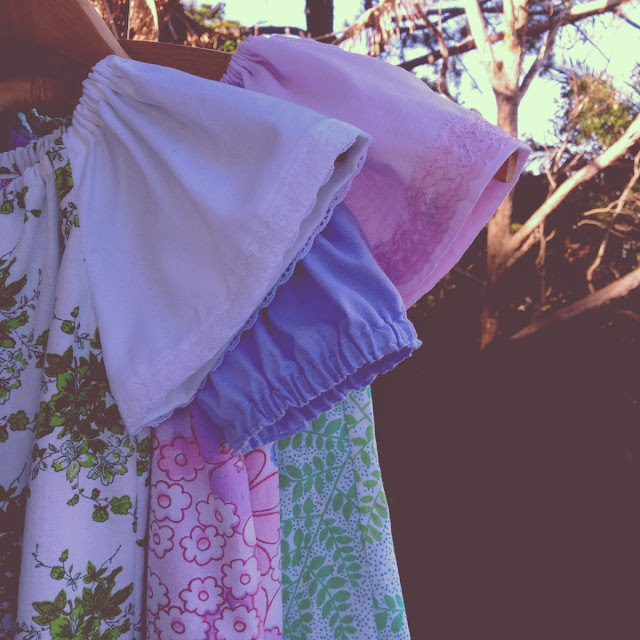
:: I've finished a vintage sheet dress for the shop ::


:: and a book delivery in the mail has had me doing some dreaming and planning new sewing projects for 2014 ::


Thanks for reading along this year :: have a great Christmas and New Year's break and see you next year!  xx

Saturday, December 21, 2013

Let it snow :: making snowflakes


Not long to Christmas Day now, it's certainly well into the hot sub-tropical summer where I live but those Northern hemisphere traditions of fir trees, snow and sleigh bells prevail.  My son's class at school were busy in the final weeks of school making paper snowflakes and covering them in glitter to decorate their classroom, and while I have to say they looked a bit out of place in the heat, they were pretty.  Plus they got the kids pretty excited at the patterns they were making when they opened up their folded and cut paper.

Maybe your kids would like to make some too?  You only need to grab a few sheets of paper from your home office printer and square them up and you're ready for a quick and satisfying activity that no matter how hard you try its pretty hard to make a bad one or mess them up (glitter is absolutely not required if you don't want to go there in the mess department).  If your kids are old enough to wield a pair of scissors by themselves then they can make (and hang!) a few on their own which would give you at least thirty minutes to "get something done".  Goodness knows we're all making lists and checking them twice this time of year!

And ho!  Making his crafty debut on this blog is my seven year old son, Alexander and his instructions for making snowflakes.  

Here he goes (instructions left to right, top to bottom):


1. take a square of paper (we used 21 x 21 cms)
2. fold it diagonally into a triangle
3. fold it again down the middle to make a smaller triangle
4. take one corner bring it over enough to make a fold down the centre


5.  take the other corner and fold it towards the centre so that it wraps around the fold you just made
6.  cut off the two sticking out points so that the bottom edge of your folded paper is straight
7.  cut small shapes out of the two long edges of your folded triangle.  Little curves and triangles are good,          using pinking shears would also give some rather cool effects
8.  carefully unfold your triangle and you have...

...a snowflake!


I put little holes in the top of our snowflakes and hung them at the window with a couple of mini reindeer, a snowflake-reindeer bunting of sorts.  It's hard to photograph against the light coming in the window but it looks really great, plus they blow around gently and dance in the warm midday breeze and are guaranteed not to melt :: a win win.


Happy snowflake making.

Tuesday, December 17, 2013

Kimono scraps patchwork cushion :: for Mum


Last month my Mum had a birthday, a good enough excuse for me to travel back to my hometown of Melbourne for a family weekend.  It was great, I went alone and relaxed without the children.  I listened to my siblings and their partners talk around the dinner table about their pets. So refreshing, no talk of small people at all!

I tucked a handmade present under my arm when I flew down south.  I made my Mum a cushion - a patchwork of little scraps of kimono fabrics that I had been hoarding for years.  I know she loves pale shades of pink and purple so it just seemed like the perfect project to cut into those lovely fabrics.  I was so pleased at the way it turned out, and Mum loved it too.


Sewing with these fabrics was very much try it and see, there were lots of different fabric types and textures from a stiff kind of crepe to slippery silky ones.  I wasn't sure how they would combine together but it worked out just fine.  As you can see above the layout of the slightly rectangular pieces was four rows of six.  I top stitched down both sides of the long seams to add a bit of interest and to give the patchwork some strength.


The reverse side was three larger pieces using some of the same fabrics. I sewed these together and then just trimmed them with my rotary cutter to match the finished size of the patchwork side.  Again I top stitched along the seams.


I had also been waiting for an excuse to try out using pompom trim so when I saw this mauve trim in the store I knew it was the perfect finishing detail.  I pinned it into the side seams and then machine basted all the way around to keep everything in place before doing the final seam.  There was no way I was going to get a zipper closure into this cushion so I simply stuffed it with poly-fill and hand stitched the opening closed.


This corner was my favourite, a touch of gold on the flower and the dark blue leaves coming in from the edge.  So pretty. 

:: Happy Birthday Mum ::


LinkWithin

Blog Widget by LinkWithin